Teaching Your Child to Write Paragraphs

Paragraphs are the building blocks of essays and papers so it's important that kids learn how to write unified, coherent and well developed paragraphs.

Here are some resources to help you teach kids how to write great paragraphs.

Lessons/Tutorials

Graphic Organizers

Hamburger Organizers
A popular method to teach younger students how to write paragraphs is to have them write down their ideas in a hamburger shape. The top bun is the topic sentence; the burger, lettuce and tomatoes are the details, and the bottom bun is the concluding sentence.
  • Reading Rockets Hamburger Graphic Organizer page - this page includes tips on using the graphic organizer and has two graphic organizers you can download.
  • Timandevail.com's Hamburger Paragraph Graphic Organizer - this is a black and white version of one of the ones that are linked above at Reading Rockets. This is nice for slightly older elementary students  as the topic sentence, details, and concluding sentence is not in the actual hamburger but lines are provided off to the side; as older students may be using more detail or complex sentences, I think this gives better space.


    Fall Crafts: Glass Bowl Luminary


    We normally do construction paper and glue type of crafts so I was a little uneasy about trying something different. But, I'm so glad we did.  Although my preschooler lost interest very quickly, my 8 year old enjoyed this craft.

    We got the idea from Where Imagination Grows Mason Jar Luminaries.

    What you need:


    • Mason jars (or as we used, a  bowl resembling a fish bowl from the dollar store. )

    • Tissue paper (fall colors such as orange, yellow, red, and green)
    • Brown construction paper (optional)
    • Scissors
    • Mod Podge (we used a homemade substitute of school glue and water)
    • Sponge brush (we didn't have one so we used a wide paint brush, this is to spread on the "mod podge"
    • Glitter, optional
    • Candle
    What you do:
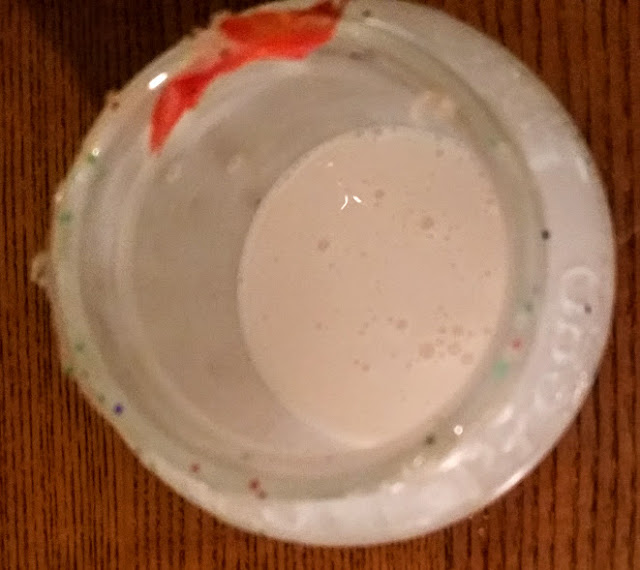
    1. Make your Mod Podge (unless you are using commercial mod podge). I'm frugal and wanted to give the homemade recipe a try. I read that the homemade version moreso works with paper crafts (I tried it on leaves and it wasn't strong enough so I agree). To make the mod podge, you need an equal amount of glue (again we used school glue) and water. I used about 1/4 cup of each. Next, mix them (shake them up together in a jar with a lid.)


    Our homemade mod podge:

    homemade mod podge

    homemade mod podge


    2. Tear up pieces of the tissue paper into small pieces. I liked to make them about the size of my thumb pad or thereabouts. My toddler joined us on this part but she got tired of it quickly.

    3. Take your bowl and working in small sections at a time (so the mod podge doesn't dry), apply the mod podge with a sponge brush or paint brush. Then, place bits of tissue paper onto the mod podge. Continue in this fashion with the mod podge and then tissue pieces until you have covered the whole bowl or jar.

    4. The blog where I got the idea from, used brown construction paper to make trees. We did this, but the trees aren't the most visible as hers were.

    5. After the whole bowl or jar is covered with the tissue paper, apply a final coating of the mod podge over the tissue paper with your sponge brush or paint brush. You can also sprinkle it with glitter. (As we were working on this craft, I wasn't too sure how it would turn out. We had finished and my daughter picked up the glitter that we had used on the Popsicle Stick Apple Core Craft and started "throwing" it over the tissue paper (and boy did she have fun with that) and then it ended up looking much more awesome.)

    6. Let dry.

    7. Place a candle inside the bowl/jar and light it and you are done.  The candle I bought was very tall so only the top portion of our luminary was lit.  I then used a tea candle we had on hand and it lit up nicely.


    Fall Crafts: Popsicle Stick Apple Core Craft

    Here's another quick and easy fall craft that we worked on this weekend.


    This idea came from the Glued To My Crafts Blog.  My 8 year old and I worked on this this afternoon. You can see the original directions at the blog above and below I explain what we ended up doing.

    What you need:
    • 3 popsicle sticks per apple core
    • red or green paper (you can use construction paper, we used Astro Brights paper which is thinner than construction paper)
    • brown construction paper
    • glue
    • scissors
    • glitter (optional)
    • black or brown marker
    What you do:

    1. Glue the three popsicle sticks together side by side. (We just used Elmer's school glue)

    2. When the glue has dried and the sticks stick together, cut out the top and bottom of the core (red or green). I traced half way around a soup can to get a semi circle and that was too big so I cut off lengthwise some from the bottom of the semi circle and that worked out nicely. Glue the apple top and bottom to the sticks.

    3. Cut out a leaf from the green paper and a stem from the brown construction paper and glue behind the apple top piece.

    4. Draw apple seeds, if desired, on the popsicle sticks.

    5. Optional (which my daughter loved), put glue on the apple top and bottom and add glitter.


    Fall Crafts: Paper Strip Pumpkin


    This easy craft kicked off our fall craftiness. I like it because it uses the similar idea (paper strips) of our Ramadan paper lanterns.

    I got the idea from DLTK and used their template for the leaves. I bought green "pipe cleaners"  (or as they were called at Walmart "fuzzy sticks") for the vines.

    What you need:
    • Orange construction paper (to be cut up into strips)
    • Scissors
    • Green construction paper for the leaves (or you could print out on green paper or paint the leaves)
    • Fuzzy sticks (for the vines, optional)
    • Paper fasteners (as I grew up calling them, brads)

    You can catch the instructions at DLTK but all we (read I) did was cut the orange construction paper into strips (cutting lengthwise) and then punched holes in each end of all the strips and insert a paper fastener at each end. Then, I spread out the strips to form a sphere. I added the leaves and the vines to the top paper fastener (curling the fuzzy sticks with a pencil).

    Also, I would take their advisement and cut out more than 12 strips to get a fuller pumpkin. On our first try, we only used 12 and had so much space in between the strips. I cut up more strips so that we had about 23 or so and it was much fuller.

    This was our first craft of the evening (yes we started pretty late in the day, the craft bug just hit me) and we went on to make 2 more crafts that evening, the Pom Pom Apple Tree and Button Indian corn. I pretty much made the pumpkin on my own but when the kids saw it they got motivated and we cranked out the other two fun projects.

    Fall Crafts - Pom Pom Apple Tree


    This is another quick and easy craft that my kids enjoyed, especially my toddler. I got the idea from CraftOnSea.co.uk

    What you need:

    • pom poms
    • colored paper and/or felt
    • glue
    • scissors
    The post on CraftOnSea used felt for the tree bark but we went for all construction paper in this one. The kids had fun gluing on the pom poms. My 11 year old snarkily pointed out that you wouldn't have two different types of apples on a tree, but we stuck with red and green to make it more colorful.

    I drew the tree and bark free style but you can google and find tree templates to print and use.

    We're on a roll with fall crafts (having made 3 in 1 day, so stay tuned for more, in sha Allah. We hope to make many of the ones I've collected on pinterest:


    Fall Crafts: Indian Corn Button Craft


    We really got into the craft mood this week (we did three fall crafts in one evening! Quite a feat since I am "craftily" challenged) This Indian corn button craft was one of them.

    I found the idea at The Pinterested Parent - Button Indian Corn Craft. This was a really neat craft for my 3 and 8 year old girls.  It was super easy and quick to make. At first, I was putting the glue on the corn and having the girls put the buttons on. The next thing I knew, my 3 year old was putting drops of glue and buttons on by herself.

    I showed them pictures on google of what Indian corn was and my 11 year old passed by and started asking questions about Indian corn -- did it grown naturally like that? Can you eat it? Well, I had no clue so I googled a came across a few helpful articles:
    The directions for the craft can be found at The Pinterested Parent - Button Indian Corn Craft. You can really just look at it and make it on your own though. On her instructions she says to cut a corn and husk out of construction paper, but since drawing is not my area of expertise, I had to look for a corn template because my freehand is kind of pitiful. I found a corn and husk template here.

    If you are looking for an easy craft and you've got extra buttons around, this is a fun one to try. You just need:


    • buttons of different colors
    • green construction paper
    • yellow construction paper
    • glue
    • scissors


    If you are looking for more fall crafts, check out my Fall Crafts Pinterest Board:

    States of Matter


    Video


    Printables

    States of Matter Matching (words) - Free from TpT

    TJ Homeschooling States of Matter Printable - contains two graphic organizers; student cuts and pastes the correct state to fill in the box:
     Student labels the arrows with the correct process names (i.e. evaporation, condensation, freezing, melting, etc)

    Check out more ideas for the States of Matter at my States of Matter Pinterest board:

    Physical and Chemical Changes


    A physical change changes the LOOK of matter, but it is still the same kind of matter.

    Examples: tearing paper, ice melting

    A chemical change  changes matter into other kinds of matter

    Examples: a gas is formed; iron rusting, a candle giving off light and heat

    Videos


    The audio is not so great on this next one, but I thought it gave a great overview of the topic:


    Worksheets/Paper Activities


    Online Activities

    Internet4Classooms - links to many online activities

    Experiments

    Check out my Pinterest board for experiment ideas to illustrate chemical and physical changes:

    Easy Streusel Topped Banana Bread


    Banana bread is one of our favorite sweets.  The majority of the time I have made it with a streusel topping which makes it even yummier!

    The recipe that I have been using lately is from Taste of Home, one of my favorite recipe sites.

    Ingredients


    Banana Bread
    • 1-3/4 cups all-purpose flour
    • 1-1/2 cups sugar
    • 1 teaspoon baking soda
    • 1/2 teaspoon salt
    • 2 large eggs
    • 2 medium ripe bananas, mashed (1 cup)
    • 1/2 cup canola oil
    • 1/4 cup plus 1 tablespoon buttermilk*
    • 1 teaspoon vanilla extract


    The original recipes calls for an optional 1 cup of walnuts to be folded in after everything is mixed, but a few of my kids experience side effects from some nuts so I don't put them in.

    Streusel Topping
    The original recipe does not call for a streusel topping but we love it! Works well on other quick breads such as zucchini bread, coffee cakes, etc)


    • ½ cup packed brown sugar
    • ½ cup all-purpose flour
    • ¼ cup quick-cooking oats
    • ¼ cup (4 tablespoons) butter, room temperature

    What to Do

    1. In a large bowl, stir together flour, sugar, baking soda and salt. 
    2. In another bowl, combine the eggs, bananas, oil, buttermilk and vanilla; add to flour mixture, stirring just until combined. 
    3. Mix up your streusel: Mix together brown sugar, flour, oats and butter until about pea-sized crumbles form. Set aside. (You can find the recipe for this again in my Streusel Topping for Quickbreads post)
    4. Pour batter into a greased 9-in. x 5-in. loaf pan. 
    5. Sprinkle streusel topping over the batter.
    6. Bake at 325° for 1-1/4 to 1-1/2 hours or until a toothpick comes out clean. Cool on wire rack. 

    Yield: 1 loaf 


    *Buttermilk 

    I hardly ever ever buy buttermilk so I make a substitution by combining lemon juice (or white vinegar) with regular milk.

    Here is the substitution I've been using:

    For each cup of buttermilk, use 1 tablespoon of white vinegar or lemon juice plus enough milk to measure 1 cup. Stir, then let stand for 5 minutes. (Source: Taste of Home)


    Why use buttermilk?
    I wondered the same thing so I googled and found out that the reason why buttermilk is great to use in cakes and baking is that it combines with the baking soda to produce bubble of carbon dioxide gas. These bubbles are what gives your cake more volume. In addition, I read that this acid interferes with gluten formation to help keep your cake tender and light (Why Use Buttermilk - LifeMadeSweet)


    Beginning Consonant Blend: TW


    TW Word list:
     twig, twin, twit, tweed, tweet, twelve, twenty, twice, twine, twirl, twist

    We ended up studying this blend by itself and it was a bit hard to find resources for just this blend, but I stumbled upon a few which were very helpful.

    Activities:

    TW Blend activities pack from CarlsCorner - includes a "tw" word slide. cut and paste activity, cloze activity, crossword puzze, word search and more.

    TW Worksheet from Study Ladder


    Our TW phonics notebook entry with resources from CarlsCorner (see link above)