Update on Making Money at Home with Amazon's MTURK

As promised, here's an update to my MTURK experience 
(all of two weeks at this point).

Did I Get Paid?

You betcha, alhamdulillah! As I mentioned in my previous post, Got Some Extra Time in Your Day? Earn Extra Money with Amazon's MTurk, the Amazon MTURK program has two ways for you to get paid: 1) transfer your earnings to your bank account or 2) get an Amazon Gift Card.  My kids (my two oldest, that is) and I chose to get the cold hard cash via bank transfer. The whole process is very quick! (well at least for us it was).

So let's say you did some work. Under "Accounts" in your "Dashboard," you will see how much you have earned. Now that money is not available until it pops over to the "Earnings Available" column on your dashboard (I'm not sure how long it takes but sometimes I have noticed my Earnings Available increasing throughout the day, so it's fairly quick depending upon how quickly the Requestors approve your work).

So when you have earnings available, you can get paid! (in shaa Allah).

But first things first: If you want to turn your earnings into cash, you need to first add a bank account and then get that account verified. You have two ways to verify your bank account:

  1. By logging into your account through Amazon Payments' interface
  2. or by having Amazon put two small deposits in your bank account and you verify the amounts.) This took maybe 1-2 days for us. 
After your bank account is verified, whenever you have transferrable earnings, you transfer them first to Amazon Payments and then transfer to your bank account. It sounds like a bit of work, but transferring your earnings to Amazon Payments takes maybe minutes or even maybe a couple of hours (I can't remember exactly). Once your earnings are in Amazon Payments, you choose to transfer to your bank. When I did this, the funds were in the bank the very next day (I think it really depends upon your bank though so Amazon will tell you to expect 5-7 days for the transfer).  Now, I should note that you can only do 1 transfer of earnings to Amazon Payments each day (but you typically would probably want to let your money stack up anyway, so I found it to be no big deal) and if you don't want it to stack, well hey, transfer new earnings tomorrow, in shaa Allah.

Now, I've only been "turking" for two weeks, but so far, I am averaging $50 a week and about 100 hits/week (I've seen that some people make $100+ in one week or even more amazing weekly amounts). Amazon MTURK sends you a nice little email at the end of the week summarizing your earnings/performance (but you can always check in your dashboard as well).


MTURKING Tips

These past few weeks, I have learned so much about MTURK. I wanted to try to learn as much as I can to become more efficient.  In the process, I ran across some great forums where fellow MTURK workers share tips and great advice. Here are a few:

MTURK Forums

A fellow Muslimah blogger turned me on to a great Facebook Group for MTURK:

Facebook Groups

  • MTURK Members (lots of great support, advice, and encouragement here)

Scripts

Ok, I was very skeptical of  scripts when I first started reading about them. They sounded scary. But once I took the plunge to look into them and installing them, the whole MTURK experience has improved. Now, you have to be careful, because there are malicious people out there who write harmful scripts or scripts to cheat.  Obviously you want to try to stay away from those as they can harm your computer or put you in violation of MTURK terms. So, if you want to use scripts, do your research and be sure to check out what people say in forums about particular scripts.

So why would you want to use scripts? 

Well, there are hundreds of scripts written and many of them can help you be more efficient with your turking.  For example, there is a script that automatically searches out HITS (the tasks) for you. You can set up parameters (such as HITS over $0.50, or HITS with a particular Requestor, for example).  With this script (TurkMaster), it will notify you when it finds HITS that meet your parameters. You can get an audio notification and even desktop notifications if you are not on MTURK pages.  There's also a handy script that makes available to you, your MTURK ID number. Trust me, you will need this ID a lot and I found a handy script that makes it readily available to you while completing HITS (otherwise you have to go back to your dashboard and keep copying and pasting it each time you need it. And these scripts are just the tip of the iceberg.

Quick Guide to Scripts

Two things you need to know to get up and running with scripts:

1. First, you most likely will want to install a browser extension to manage your scripts (If you use Chrome, you can add an extension called TamperMonkey. If you use Firefox, install Grease Monkey). These are nifty because they let you see all the MTURK scripts running on a particular page and you can choose to disable certain scripts from these extensions. A button for these extensions is placed in the top right corner of your browser).

2. Then you look for scripts, research them, and install them. Once installed, they will show up from your script extensions (GreaseMonkey or TamperMonkey) if those extensions are running on a particular page (MTURK pages).

So, how I got started with scripts was running across these two excellent pages which tell you how to get started (basically what I explained above but with links) and give you lists of great scripts to start with, so I highly recommend checking these pages out:

And that's how my MTURK experience is going for now......

Got Some Extra Time in Your Day? Earn Extra Money with Amazon's MTurk

Want to earn some extra money at home or on the go? You may want to check out Amazon MTURK and its "artificial artificial intelligence" tasks.

Earn Extra Money with Amazon MTURK

A little over a week ago, my oldest son shared with me what has turned out, so far, to be an excellent way to make some extra money. It's called Amazon Mechanical Turk (or Amazon MTURK). Basically, it's a program where "workers" complete small to big tasks that range anywhere from just a few cents to upwards of $50 per job.

Now, several years ago, I stumbled across Amazon MTurk and I started doing some tasks, but most of the ones I remember were just a few cents here or there. So, when my son told me about it, I was a little skeptical. But, he'd made a few bucks from it in the few days he had been doing it, so I thought, what the heck, I'll give it a try.

So far, I'm so glad I did!

By the end of my first full week, last week,  I had made over $50!  My daily averages have been fluctuating. My first day I made over 11 dollars and the next day I made 3 and it's been as low as $1ish. It varies, as you can see below:

Amazon MTURK results
And here I have 25 HITS pending so those numbers should go up.

Now, I haven't cashed out just yet, but reading reviews online, I don't think that will be an issue, plus it's through Amazon, so I do have confidence that I'll actually get paid, in shaa Allah. My son just put in a bank transfer a few days ago, and it said it could take 5-7 days, so in shaa Allah, I'll report back how that went.

If this seems like something you are interested in, read on for tips on getting started and working through Amazon MTURK!


How Do You Get Started?

Head over to https://www.mturk.com/worker to sign up. I already had an Amazon account, so I just signed up with that.  

Upon signing up, you will have to get approved and this takes up to 48 hours. My oldest son, my oldest daughter, and myself all signed up and it pretty much took the 48 hours or roughly under that. So expect at least that much. NOTE: You cannot do work until you are approved. You can view tasks (known as HITS) but you cannot do them until you are approved.

Starting the Work

So once you are approved, you are ready to work! (You will be notified via email or you can just keep checking back at Amazon MTURK).  Basically you will do the following:

  1. SEARCH for tasks (known as HITS)
  2. When you find a task you think you can/want to do, you ACCEPT it
  3. Do the task and once you are finished, SUBMIT it.
Here are a few tips and things I've learned for getting through the whole process:

Searching

When doing searches for HITS, you can search mainly two ways:

1. Search all HITS (and you can sort them by newest HITS, least amount rewarded for HITS, greatest amount rewarded, those that expire first, those that expire the latest...and a few more filters that you can apply. )

2. The first way of just searching all HITS is not how I typically work. You can set a filter for the lowest amount of compensation per HIT you want to attempt and you can set it to show only those that you qualify for.

Most HITS, in some shape or form, have minimum qualifications that you will have to satisfy. Some have more "rigorous" ones and you may have to take a qualification test to quality for those.  In the HIT search window, in the right top hand corner of each hit, it will show you if you qualify or not.

Now, when I search, I add different filters and then when I've gone through the search results based upon my filters, I'll try another filter. Sometimes I up (or lower) the minimum amount. Most of the time I only do those that I qualify for (using that filter to find them--a check box at the top of the search page) but sometimes I venture into all HITS (still filtered by price, or expiration, etc) because sometimes you only have to request qualification and then sometimes you have to take a test.

Viewing/Accepting HITS

So now you are scanning through your search results based upon any filters you may have applied. As you scan through them, you'll be looking for reward amounts. Each hit has a few links in it. You can click on the HIT name to find out a tad bit (and usually just a tad bit about the HIT).  Once you click on the title link, it will also tell you what qualifications they require. If it's a HIT you qualify for, you'll see that you meet all the conditions. If not, it will tell you there (and in the right hand corner of the HIT), that you need to request qualification or take a test for qualification).  

So once you've found a HIT that seems like it's up your alley, you will want to click on "View HITS in this group." That was a little confusing to me, my son guided me through. What we do is right click on that link (view hits...) to let it open up in another window.  I always keep my original search open because when you finish a HIT, most of the time it sends you to a generic, all HITS search that usually shows task for pennies. 

Once you select "View hits..." A new window opens up with more details about the task. At this point, you will want to read the HIT description and decide if you want to undertake it. Be sure to review the reward amount and time allotted before accepting to see if it's worth your while. If so, click ACCEPT ( occasionally there will be a CAPCHA above the Accept button, so look for that to fill out or you can't accept). 

Once accepting the HIT, and depending upon the type of task, you will either see a link to click on or, the actual task in that window. You must accept the task or you won't get paid, so don't forget! With some tasks, if there is a link, you may be able to click on it before you accept to see what the HIT may be like, but in other situations, you must accept the task first.

One thing to note: You might click on "View Hits in This Group" (remember to open in a new tab/window) and then you may see a green bar that says "there are no more HITS In this group." That means that HIT is no longer available and you need to go back to searching for HITS.

What If I Don't Want a HIT?

Now, obviously you should look over  a HIT thoroughly before accepting it. But let's say, you start the HIT and realize you don't want to do it? Simply return to the HIT window for that task and click the button on the top or bottom that says "Return HIT." Don't forget to do this because if you don't, your HIT will get rejected and that reflects negatively on your stats (more on this later in shaa Allah). Every so often, go to the "HITS" tab at the top of any MTURK page, click it and look for the link underneath that says "HITS assigned to you." Check this often because sometimes you might forget to return a HIT and it will show up here (as well as ones you currently meant to work on). You can easily click on the HIT and return any HITS you forgot to return.

Working on Your HIT

Now you just work on your HIT.  One thing to note, is that sometimes the people who need the work done (called Requestors) have put up that HIT before and they do not want you to redo HITS. Sometimes it seems as if the system or the requestor has a way to automatically check if you have done a HIT before, sometimes you will have to enter your MTURK worker ID number to see if you have completed this HIT before.  I try very hard to remember if requestor names seem familiar or the task seems familiar and not do them. If you redo a hit, and they have specified that you cannot do a HIT multiple times (sometimes you can) then you will not get repaid, so I recommend trying to remember as much as possible in case the requestor hasn't seemed to get it to automatically check your eligibility.

Submitting Your HIT


Once you have finished the HIT task, you will push the SUBMIT button. BUT BEFORE YOU DO, sometimes, a requestor will provide you with a security code (I get this a lot with research surveys). You will need to take that security code and paste it into the HIT window BEFORE submitting. Failure to do so will mean that you won't get paid for your work!  Sometimes the requestor will use your MTURK ID number so you may find yourself searching for this often to copy and paste into a field.   You can find your MTURK number by clicking on the "YOUR ACCOUNT" tab and looking under the search bar to the right to see "Your Worker ID: xxxxxxxxx" I find that I need this a lot, so I try to keep that window open in a separate tab so it is handy. You could also copy and paste it into a Wordpad document, etc. and have that open while doing HITS.

When you have finished a HIT and you push submit, near the top of the page, you should see a green bar that says, something like, you have successfully submitted your HIT and it is awaiting approval or rejection from the requestor.  

Once, you've finished the HIT, sometimes a search HIT page comes up. I always close this and go back to my first search page (with my filters) to look for more HITS as the ones you get when you finish a HIT are unfiltered and usually ones for 0 cents or just a few cents. 

Checking Your Stats/Earnings

At any time, you can go to the "Your Account" tab and check your earnings.  You can check your day by day earnings.  One thing to note: Requestors sometimes take some time to approve your HITS so you won't see the money that you earned in your stat area until the HIT has been approved. Sometimes HITS are approved automatically, sometimes it's taken a few hours or days for a HIT to be approved. 

What types of tasks are available on MTURK?

There is a variety of tasks on MTURK. I find where I currently make the bulk of my money is on research surveys. Most of the time, these are pretty quick, though some are ridiculously long for the compensation.  I tend to find ones from any where from $.25 to one I did for $2.70. I try to stick with HITS that are no less than $.25 but sometimes I venture to those for less reward because if you find a small paying task you like and there are many of them (some HITS have only 1 opportunity available and some have hundreds). I love the research surveys because they are usually very interesting to do and cause you to often reflect on yourself or political/social issues.  They are not like consumer surveys that you might fill out on paid survey sites. You may have to qualify for some of the research surveys (you put in your demographics and it may not fit the survey), but I find that for a great deal of the surveys there are no pre-screen questions to weed you out.

Other tasks include entering items from scanned business cards or receipts into a template. These usually pay around $.03 or so. If I find one that's fun, I may do it, like the business cards, but I tend to stay away from the receipts as sometimes you have to enter a lot of items from the receipt. But, if you like to do that, these can add up.  I started off doing ones like these, but I generally go for the bigger reward ones now.

One type of task that probably has the biggest rewards is for transcription. I have seen transcription tasks that go for as much at $50.00! I like transcription, but I have to start on easier jobs for cents or maybe a dollar and work my way up before I would even attempt the big ones. But, if you are good at it, that can be a way to earn some big money more quickly.

One task I had to do was to look at 100 pictures and tell if there was a human in the picture. That one was easy.  Sometimes you play games or test a website for usability.  There is just a large variety of task types on there and a lot  are really interesting so you can have fun while completing HITS.  

The R word: REJECTED

Ok, another important thing that I can think to tell you about is the dreaded rejection. Sometimes your HITS will be rejected, meaning that the requestor did not approve it, but rejected it. If you give phony, bogus answers, or it looks like you sped through maybe a survey, that is cause for rejection. Or one time I entered the security code correctly so it was rejected. To date, I only have 1 rejection. The system gives you stats on your number of HITS submitted, approved, rejected, and pending. If your HIT was rejected, it may tell you why in the last column of the HITS summary page for a given day. At any time, you can view the status of your HITS in the HITS summary page. Under the "Your Account" tab, choose the day you want to look at and it will tell you the status of each HIT you have submitted. Sherrie

Be watchful of your rejection rate as some HITS require a rejection rate not greater than X% (or conversely an approval rate no less than X%).

Getting Paid

As I have said, I haven't submitted a request for payment yet. What I can tell you is that you can opt to have your earnings transferred to your bank account or get them on an Amazon gift card (no PayPal). If you choose the bank account option, be sure to set up your bank account right away in Amazon  Payments or under "Your Account" tab and then Account settings.  The Amazon payment system is linked so if you already have your main Amazon account linked to a bank account, then you should be good to go. I think it said bank transfers can take from 5-7 days but I may have that backwards and that may just to initially verify your bank account that it takes that long.

I'll update here, in shaa Allah, how the payment process went once we get to that.  I've seen reviews concerning getting paid that seem favorable and the negative ones here and there seem to be pretty much standard where individuals may run into a situation that is relevant to their particular account/situation. But since I am recommending this currently, I will definitely try to report on any negative aspects I come across as well.  

But for now, it's all good and with my approved and pending taken into account, I've earned over $60 dollars in just a little over a week as you can see from my picture way above. (I've got some pending so the end will be greater than the amount shown above, in shaa Allah).

How Much Time Does It Require to Earn Money?

I haven't really kept track but I just do MTURK when I have some spare time. Sometimes I spend a few minutes at a time, and  others I've probably spent an hour or two in one sitting. It just depends on how many HITS I find.  On another site, a MTURK worker said they find that good HITS can be found after 9 am EST and after 6pm EST. Sometimes I get on the computer around 6 am PST (which is the 9 EST) and find a lot of good HITS.  Plus, it's a nice quiet time before most of the kids are up). But really, I check in throughout the day as well and maybe find a HIT or two, or several in spurts. The thing is to keep constantly searching and change your search filters.  

An overview of what your account dashboard looks like:


One last thing if you're still with me.......

The number of HITS you have submitted (and of course the number that have been approved) is important. The more HITS you have approved/submitted, the more tasks that open up for you. Some requestors stipulate that you have to have a certain amount of HITS to do a HIT. I've seen some as low as 50 and some as high as 1000 or 5000.  As you can see, I'm just starting out and so I don't have a lot of HITS but reaching 50 or 100 opened me up for a few more jobs, I've noticed. Not all jobs have #HITS as a requirement, but some do.

So, I hope this run down has given you some insight into how Amazon MTURK works from my very short experience working with it.  I've used other sites to make money, such as those where you earn by doing surveys, and at this point, MTURK has racked up money more quickly than any other thing I have tried to date.  And it has also provided me with a more interesting experience completing tasks than the other methods as well.

How We Ended the Dishwashing Battles (at least for now....)

End Dishwashing Battles

I have a large family.

So, we always have a lot of dirty dishes everyday.

Thankfully, alhamdulillah, I also have the "man"power to help out.

But I also have a lot of struggles.

"You didn't tell me to to wash/wipe/sweep that!"

Well, I finally learned to rename the chore from "dishwashing" to "kitchen duty." That has helped a lot. Before, some counters were not wiped. The stove was not always wiped. The wall behind the sink was never cleaned....and the list goes on.

Last week, I had a battle of sorts with one of the kids over sweeping the floor. It had been included in the list of kitchen duty, but because others had slid on this (I hadn't remained vigilant) this child was determined not to mop the floor because "no one else had done it."

So, I sat down and wrote up expectations for the job (ok, so I've done this before), but I was determined that this time I was going to try harder to hold the kids accountable. (ok, I've done that before too). But at any rate, I still sat down and wrote out---spelled out explicitly--the expectations and the consequences for not completing the job correctly (this was where I dropped the ball before being wishy washy on the consequences.) I sat all the kitchen duty helpers down and read over the expectations and posted them up on the cabinet near the dishes.


Kitchen Chore Expectations Ever since then, the kitchen has been almost immaculate.  I can see that the kids are trying really hard. I think they see how awesome the kitchen looked under the new "guidelines." One of them didn't do dishes before bed one night and she automatically did the dishes the next day (as per the new guidelines). No fight, no arguing.

Of course I am being realistic and know that this may not last forever. It's going to take work on my part to be vigilant. I noticed that when I washed the dishes during the day I made sure to wash them as outlined because I expected them to follow the rules, I had to walk the walk as well.

So, I thought I would share our new routine and guidelines in case they might be helpful to others.


Kitchen Duty

Times to Clean Kitchen

  • After Breakfast (start no later than) 10:00 am must be cleaned before 11:30 am
  • Afternoon: 3:00 pm – must be finished by 4pm.
  • Dinner (start no later than 8:00 pm and must be Finished by 9 pm


If you cannot finish by these times, you have to let me know beforehand! Otherwise you get another day!

Clean the Kitchen ( in this Order)

Clear AND Wipe:

    1.  Outer counter (stack dirty dishes neatly on counters near sink and stove)
    2. Both tables AND all chairs

(Do these things first so if you have to go do something else before you can finish washing the dishes, the kitchen doesn’t look like a nightmare) (This is my favorite rule because it gets the kitchen looking decent right off the bat)

Sort the dirty dishes before you start 

Wash:


  • Start sink with HOT water with soap and fill no more than half way
  • Put utensils in water to soak
  • Start soaking pots and pans
  • Wash cups AND put away immediately after all cups are washed
  • Wash bowls, plates, and storage containers AND put away immediately after all are washed
  • Wash pots and pans AND put away immediately after all are washed
  • Wash utensils AND put away immediately after all are washed (Sort them in the dish drainer by type (forks, knives, spoons, etc) until you finish washing them all, then put them away)

There should be NO DISHES in the dish drainer when you are  finished!!!!!!!!!!!!!! (My second favorite rule because the kids would just wash the dishes, let them pile up in the dish drainer, til they spilled over and not put them away)

Straighten and wipe:

  • Counter where the dishes and spices are stored
  • Counter near sink
  • Counter near stove
  • Stove/oven
  • Sink (and get all food out of the drain)
  • Wall behind the faucet.
  •  Move dish drainers and wipe off counter underneath

Sweep and mop floors

Verify with me that the floor doesn’t need to be mopped if you don’t think it does, otherwise MOP/spot mop it!

So that's our kitchen duty routine which is working nicely at the present?

Do you have a system in place to end the battles?


 photo yellow-ruler_zpstf30f6qm.png

Step by Step Guide to Planning Your Homeschool Year

Feel like you're wandering around aimlessly in your homeschool because you don't have a solid plan? Take the time to plan out your year for better results, in shaa Allah.

Step by Step Guide to Planning  Your Homeschool Year

When I first started homeschooling, I found that I was planning mostly week by week (sometimes day by day).  As the years went on, I discovered that it was more efficient to try to plan out the whole school year before actually starting school work.  Sometimes that can take a lot of work, but I’ve found that it is truly worth it in the long run.

This past week I was planning out my 7th grader’s year. We are in an independent study program (iLead Exploration) where I get to choose the books/curriculum so the planning was left entirely up to me. At first, we were just going day by day (with the intention that I would eventually set up a plan), and I would tell her to just do the next section in the book.  That became frustrating really quickly as some sections took longer than one class period but I didn't know that because I hadn't taken a look at the lessons in depth. So I knew it was time to sit down and start planning. The next time through, in shaa Allah, I plan to get all the planning out of the way BEFORE we start.  (We got a late start this year as our books didn’t come in until 3 weeks or so after school started so I wanted to dive in and get started when we did finally get them.) BIG mistake.  Lesson learned: Get that planning out of the way BEFORE you start!

So, as I set out to plan this past week  I thought it would be helpful to lay out my latest process for planning. There may be more efficient ways, but it worked really well this go around of planning, so I thought I would share. 

So here are the steps (at the end  you’ll find planning worksheets to help get through the steps more quickly, in shaa Allah).

1. Define your school year:


To start, get or make a calendar that spans the whole school year on one page. My favorite place to find free calendar printables is Calendar Labs.

With your calendar:
  • Pick beginning and end learning/school dates. For many years I never did this and the year I started doing it, it made such a difference.  It didn’t seem like we were just trudging along aimlessly anymore once we had  concrete (yet still flexible when necessary) start and end dates.

Some things to consider: 
  • Will you homeschool year around? (If so, it is still a good idea to pick beginning and end dates).
  • Will you homeschool by going x number of weeks with a 1 week break?  For example, some homeschoolers homeschool maybe 5 weeks, taking each 6th week off. (or 8 and taking the 9th off, etc) This also worked well for us, the number of weeks on and off sometimes varied from year to year but not within the year (but if it works for you to have varied break lengths throughout the year, do that)
  • Will you use a traditional school year?
                                Once you decide, write down your beginning and end dates!
(You can use my "Homeschool Planning Overview Worksheet" for this.)


  • Mark off your holidays/days off.    Pretty explanatory. On your calendar, mark off the days, such as holidays, that you will take off. Three of my kids are in public school, so for my homeschoolers, I try to coordinate their breaks with the public schoolers’ as well as take off days for the two Eid and sometimes perhaps yawmul Asharah or yawmul Arafah or the first 10 or so days of dhul hijjah. 
  • Define your school week. Which days will you have instruction? 
      • Will you work the traditional M-F work week? 
      • Will you homeschool 4 days a week? When we lived overseas, we followed the work week where we were and homeschooled Saturday – Thursday.
Once you you’ve decided, record this. 
(You can record it on the Homeschool Planning Overview Worksheet)

2. Determine # of Instruction Days


I used to just count up the number of days in the year, but I found a new way that I thought was more effective as far as planning individual classes:

  • Whatever days your school week consists of, count off the number of each type of day. For example, we are homeschooling M-F so I counted out the number of Mondays, then the number of Tuesdays, and then Wednesdays, etc. in the year, skipping any holidays that fell on a particular day. 

Be sure to write this down as soon as you are finished counting. 
(I made the mistake of not doing so a couple of times and had to recount, which is why I made up a Homeschool Planning Overview Worksheet

  • Now, take a look at different configurations that you could have for classes and add up the number of days, for example:
    • 5 days a week: M-F (From the previous step, add together the total number of Mondays, Tuesdays, Wednesdays, Thursdays, and Fridays). Write this down! _________________ These are your number of total instruction days for a five day a week class.
    • 4 days: M-Th (Add up your total Mondays, Tuesdays, Wednesdays, Thursdays.) Write this down! _________________ 
    • 3 days: M W F (Add up the total number of Mondays, Wednesdays, and Fridays) Write this down! _________________ 
    • 2 days: MW or T Th (Add up the total number of MW: ______________ and total number of Tuesdays and Thursdays: )Write this down! _________________ 

These are just examples, you might do other configurations such as MTW, etc, but the ones above seem to be the most common. 

3. Plan out the courses


Start with the first class you will be planning and for this class:
  • Determine the number of instruction days needed. The easiest way to do this is to look through the table of contents of your book and count the number of sections.  This tends to be easier in classes like math and science where the books may be more uniform from lesson to lesson.  Even though it can be a headache, for some classes, I usually end up flipping through the book page by page because sometimes sections may vary in length and I may decide that certain lessons need 2 days instead of one.  If you are able to, write down in the table of contents how many days each section should take (1 or 2 usually) and then you can go back and tally them up in the end, in shaa Allah. 

Write the number of lessons down (or you can use the "Course Planning Worksheet


  • Next, compare the number of instruction days needed to each of the configurations in step 2. (Refer to your results if you filled out the "Homeschool Planning Overview Worksheet" previously. See which configuration comes the closest to the number of instruction days needed for your course.  If it is closer to one of them, you can choose this option. Sometimes you may need to tweak the number of instruction days to make it fit by:
    •  doubling up a few sections on certain days
    •  using a weekend or vacation day here and there for instruction
    •  move your year-end date as needed
  • Next, based upon the above comparison, create a rough, weekly schedule showing which days of the week you will do the class. You don't have to worry about timing right now, just place the class.  
Weekly Schedule Template

At this point, you can go back and determine the number of instructional days needed for the rest of your child's courses and plot them on the weekly schedule as well.

  • Next, create a separate master pacing guide for each course. The pacing guide (I prefer table format) shows what should be done on each instruction day. 

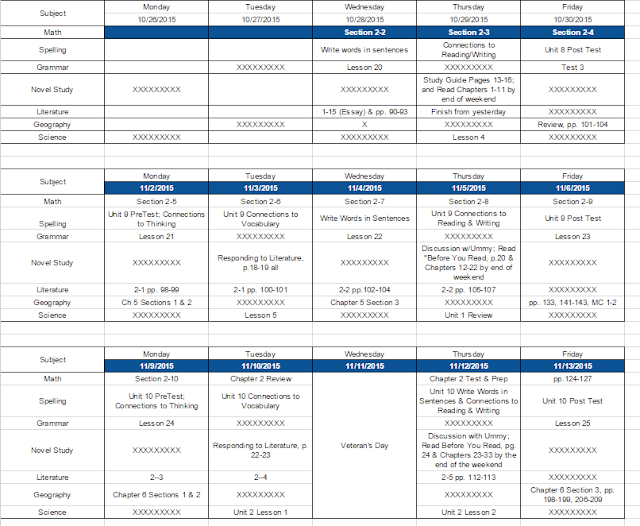
Below is an example of part of a pacing guide that I made for my 7th grader this past week:
Sample Pacing Guide
One thing to make sure is that you try to make the pacing guides consistent from class to class. Some things will obviously look different (some classes may only be T and Th, while others are 5 days a week). When I started planning, that was my intention (uniformity) but the first ones did come out somewhat different and I wish I had kept them more uniform (I do however change my color choices based upon the class. Math is always blue, Science is always green, color is a very big thing for us around here for some reason!). 

I highly recommend that you make up blank templates for each class configuration (one for M-F, one for MWF classes, and another for T, Th classes) and then just use these for each class as appropriate. When I go back and look at all the pacing guides I made this past week, it is a little unsettling to me that they are not as uniform as they could have been (but that might not be an issue for you). On your template, you may also want to type in all the holidays as well, as several times I forgot to and had to do some cutting and pasting of assignments.

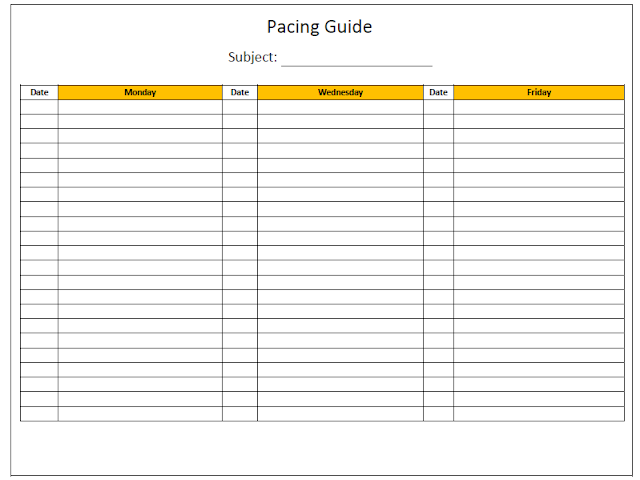
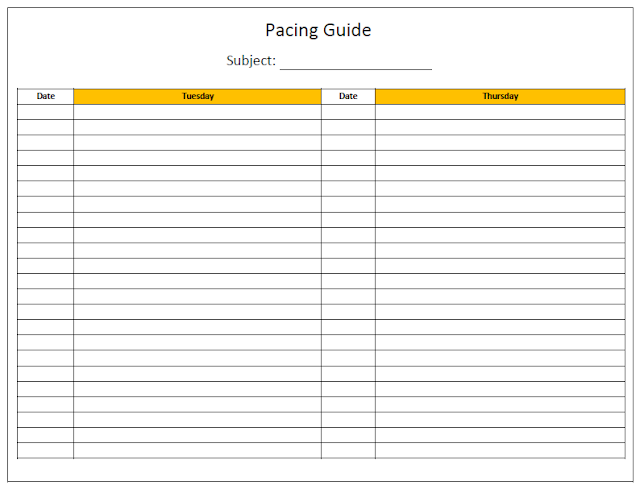
If you're not super computer savvy or you'd like a head start, I've made up a few basic templates and left them in Word so you can tweak them. I kept the formatting to a minimum so you can spiff them up as you like without having to undo a lot of formatting.

Pacing Guide Templates

Pacing Guide Templates

Pacing Guide Templates

Pacing Guide Templates

A few tips:
  • The templates contain the following weekly configurations (but you can edit them since it is a word document):
    • a 5 day week (Monday - Friday)
    • a 3 day (Monday, Wednesday, Friday) week
    • a 2 day week (Monday and Wednesday; as well as Tuesday and Thursday)
  • The templates are set up so that if you add more rows that cause the template to run more than one page, the headings will follow.
  • Also, be sure to mark off all your holidays and days off FIRST, then copy and paste each table to use as a template. I forgot to do that in the beginning and it was a headache as I had to shift things around when I went back and saw that I had forgotten to mark off a holiday/day off.


So now that you’ve got one course planned and out the way continue making pacing guides for each additional class.


4. Put it all together

Once my pacing guides are done, I place them in each child’s binder my master binder.*


I've changed things up a bit since I initially wrote this. I used to give my kids these pacing guides. Now, I keep them just for me--and here's why:   I was flipping through the pacing guides to conference with my daughter, one day, and I realized it was probably annoying for her to have to flip through these in the course of a day (I was annoyed in just these few minutes). So I asked her if she thought it would be better to have all the assignments on 1 page for the week. She agreed, so we made changes.  Now, I use my master pacing guides as just that, guides to see if we are on track and to prepare her weekly plans:


Instead of just doing them weekly, I put a whole month (not all shown here) because I knew if I didn't get it out of the way for just more than one week, I'd fall behind (and I put reminders on Google Calendar to tell me when to spit out the next month's weekly plans for her).

Now back to the original post: 

After the pacing guides are made up, I make up a weekly schedule printable for each of the kids that shows which days they have which classes and the times (you've got a head start on this if you filled out the weekly schedule form previously, now just add in the times or blocks). My kids keep this in their binders and I can post them on the wall for put them in my master binder for quick reference. 


My daughter is very much enamored with all things British right now, so I tried to incorporate some Britishy clip art to spiff up her schedule.

We already had our times/blocks worked out at this point, so I was able to make the schedule, but if we hadn't our next step would be to:

5. Schedule the Days


The next thing to tackle is your daily schedule and determine the times or sequence of classes for each day of the school week. I try to get input from my kids as to which subjects they would like to tackle first. Some homeschool veterans say that you should tackle the harder or more boring classes first and get them out of the way since, if they cause frustration or boredom, you may procrastinate and not get them done.  (I'm still working on this as I tend to go for the easy classes first a great deal of the time, so we can do at least something).

Other things to take into consideration  when making your daily schedule will be to consider who is independent and can work at their own pace, and who will need you to actually sit down with them to do the lessons. Some of my older kids work well with just attacking work in any order they choose (they just look at which classes they have for the day and consult their pacing guides for what is to be done). Others may be independent learners but still need some structure in their day, so for them, we plan out hour by hour or in specified blocks. 

My biggest suggestion for scheduling your days is that you establish morning and evening routines and prayer times FIRST and then plan the school day (start/end times, sequence) around those guideposts. It does tend to confine your school time, but I try to remember that there's more to learning and homeschool life then just school time, we've got to develop hygiene and other life style habits as well!

*****


So that’s how I am currently planning my classes now. Planning is time consuming, for sure, but taking the time to do it in the beginning can really cut down on a lot of frustration later down the road.  I also found that my daughter was a little stressed out when we were just winging it daily for the beginning of this year and she said it was so much better now that we had the pacing guides and I could tell in her demeanor as well that she felt more at ease, alhamdulillah. As I've read, kids thrive on routines and knowing what to expect next.


Another Update:

I had a few more thoughts that I wanted to share after initially writing this.  The first consideration when lesson planning, should be that of mastery, not just to finish a textbook.  In the home study program that we are in (and every other one that we've tried, K12, Connections, another local one), they consider finishing 80% of the curriculum as satisfactory or fulfilling their requirements.  The most important thing is not to try to cram so many topics into the year that your child doesn't really understand most of it, or hasn't truly mastered it.  In homeschooling, you have the beauty of going at your child's own pace. So, as many homeschool veterans have said, "don't be a slave to your curriculum."

And that's sound advice. I know I fall into this mistake over and over again and have to take a step back and reassess things. Planning is needed, to be sure, but you also have to have learn to be ok with being flexible, when it is warranted.  Get your plan for the year together, so you have some goals and direction to work with, but be willing to relax things up and go slower along the course if you need to. With homeschooling, you have the whole year (and the next and the next...) to get that learning in. If you can't finish a textbook in one year, so be it, as long as you are progressing. As I've found some kids are able to get through the material in the full year, some aren't. Be sure to plan so you can have a course for each child, but work at each child's pace in each subject.


If you need any additional help or clarification on anything, feel free to contact me using the Contact TJ button at the top of any page, or contacting me via Facebook or Twitter!


Happy Planning!